Well let me tell you this was a challenge. I didn’t want a complete overhaul because, I knew I would be giving it a holiday reboot. What to do that hasn’t been done? I can thank all of you for that! You force me to think outside my own box.
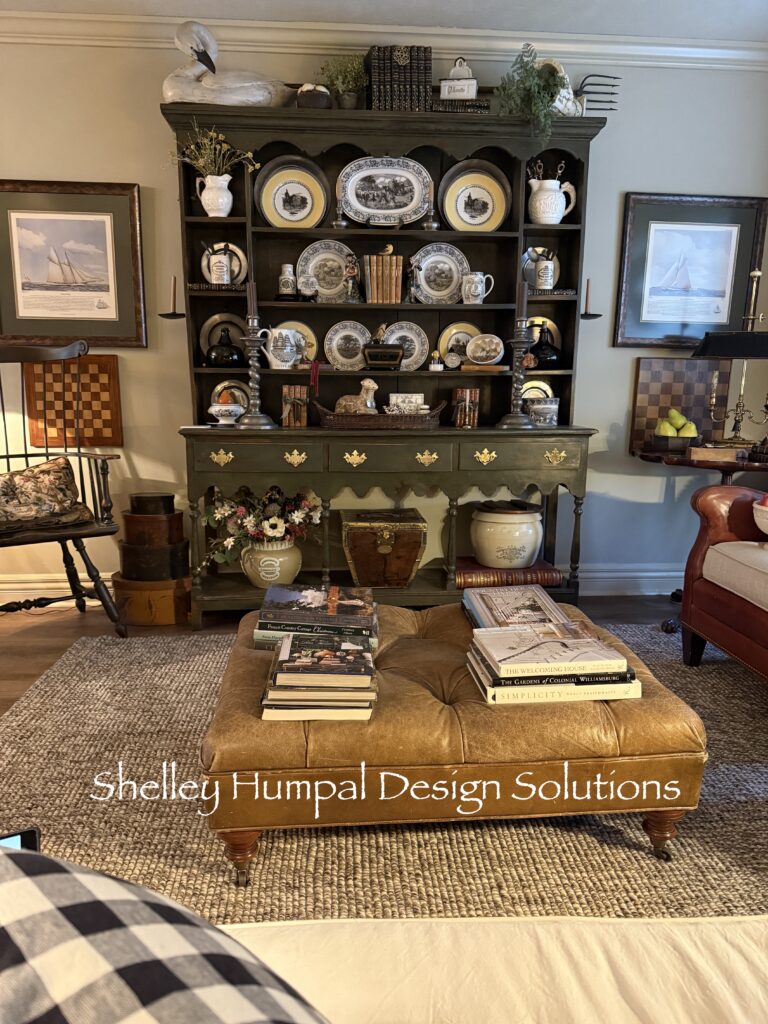
Working with the advertising stoneware collection and some Creamware, I played around for about 2 seconds! Removing the Villeroy Boch Audun dishes, I brought in some more pewter plates, just to see if I could make all my black and white graphics work with the pewter. NOT!!! I didn’t have enough to fill out this cupboard. At 6′ it’s a big run of space. It was just plain boring. Oh is that redundant?

After spending the last few mornings wearing a sweater and curled up in a quilt on the deck, while reading my book, cozy seemed good. What do I have that hasn’t been done?
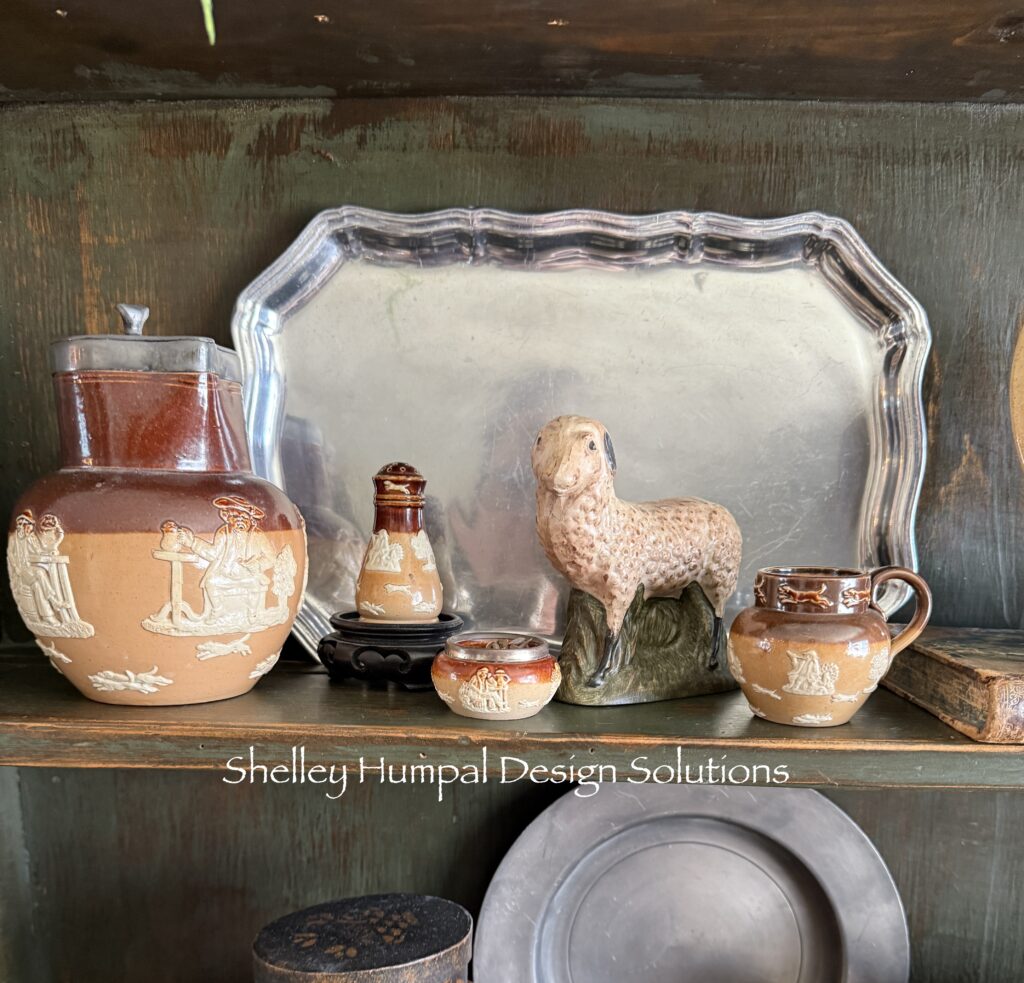
Looking around I glanced at my pedestal, that is once again on the kitchen table. It was holding all my Doulton Lambeth Pub Ware pieces. This collection is one of my smaller collections. I was sure I didn’t have enough. but with some supporting players, could I make it fly?
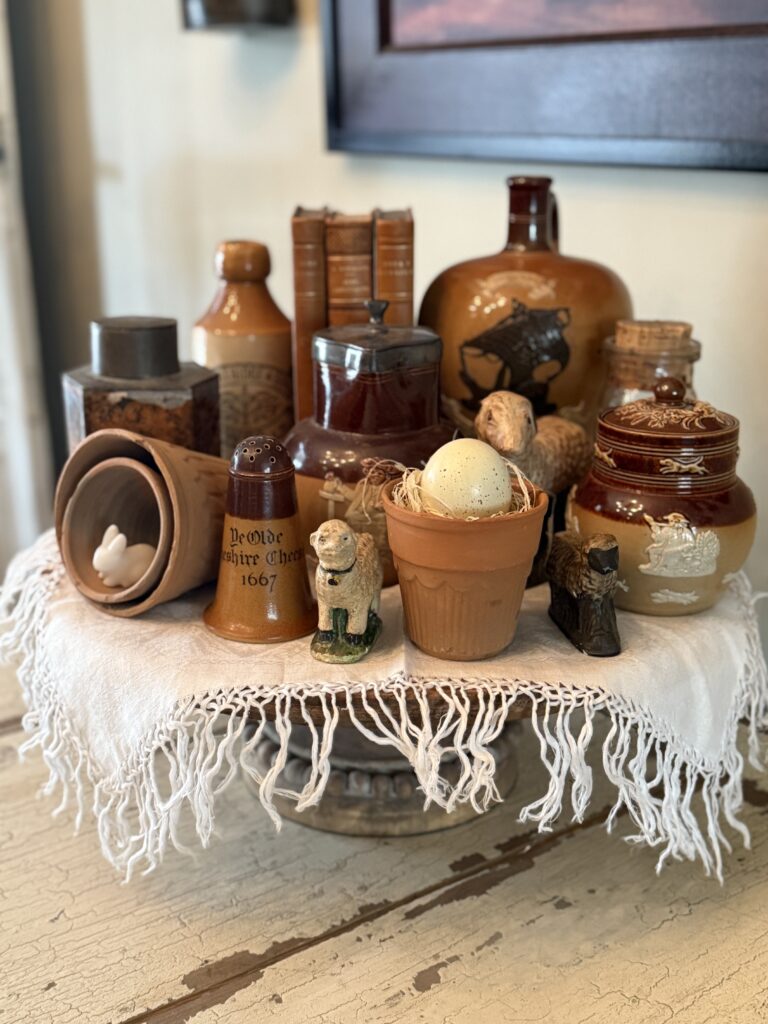
I started with the pewter as a backdrop and then scouted the house for similar colors to the Doulton. With a fare amount of antique and vintage Doulton, I brought it all together to see what could be made. Then I went in search of books, in the same color family. Fortunately most of my caramel colored books were already upstairs, so I didn’t have to upset too much.
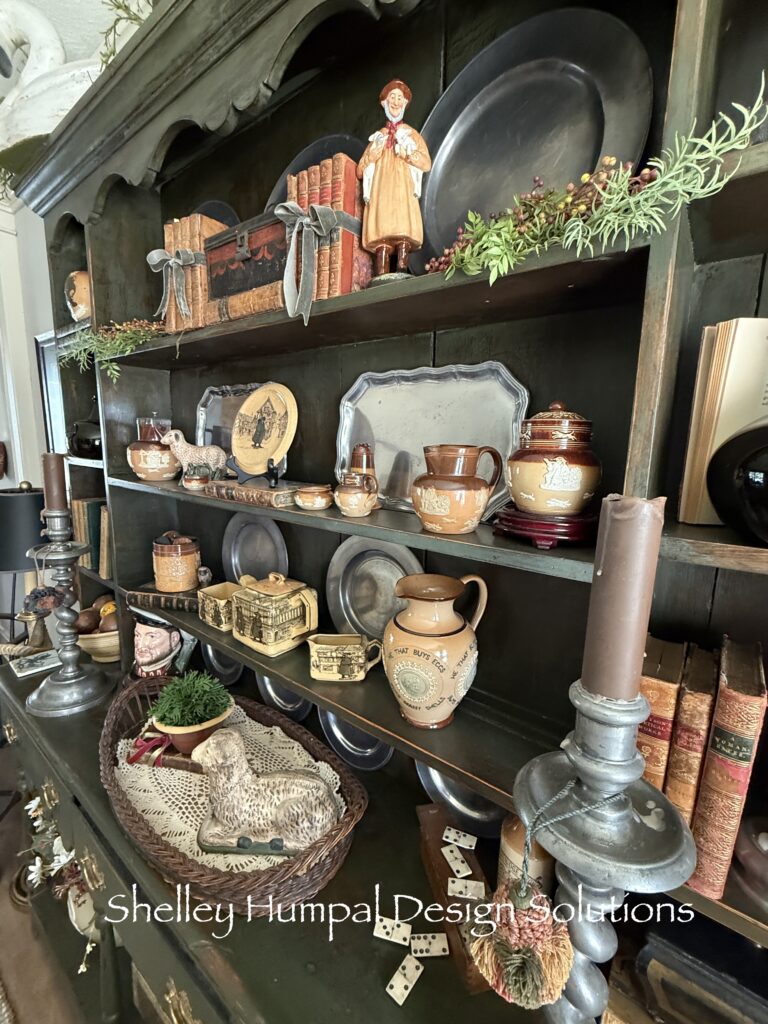
This cupboard is ALWAYS trial and error. Put things up, take it away, move it to the right, maybe a little more to the left. You know how it goes. I always start with the top shelf. Makes sense right? I had two pewter chargers already up there, and parked my tole tea caddy between two stacks of books, creating one unit. My formula with the plates was 2 on the top, 3 on the next, 2 on the third shelf and four on the bottom. Nope didn’t work!
Too many round plates, I needed another charger on the top shelf, rectangular trays on the second shelf, left the two on the third and added 4 on the bottom. This pretty much left me with no support of pewter in the outside cubbies. Hmm!
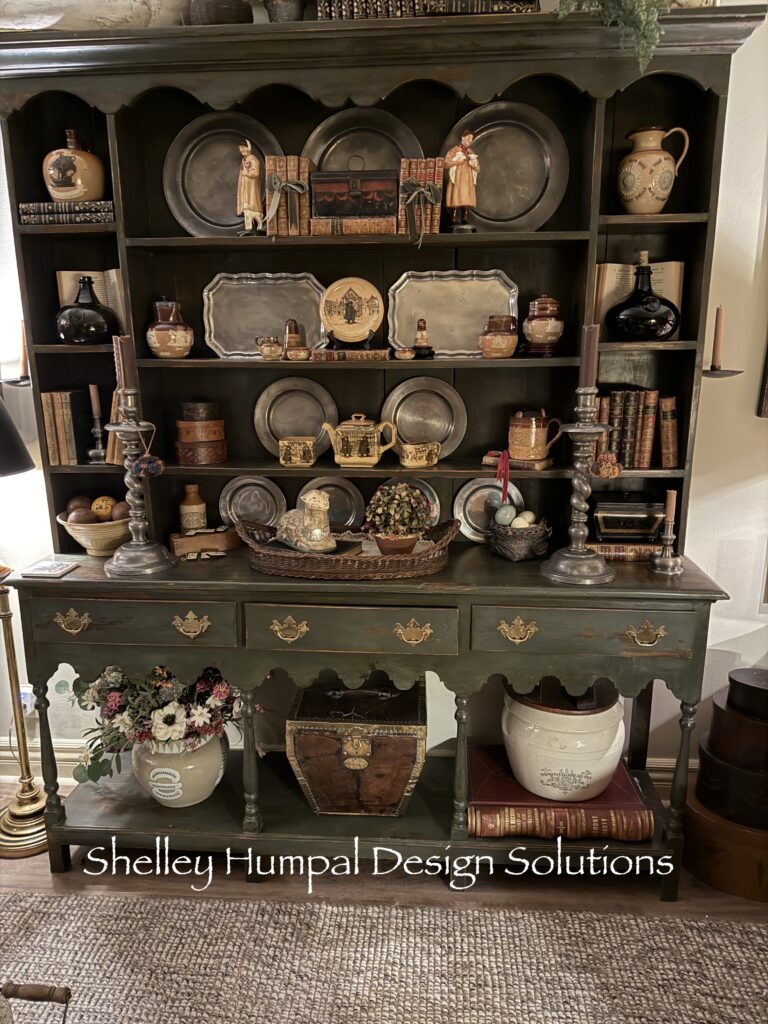
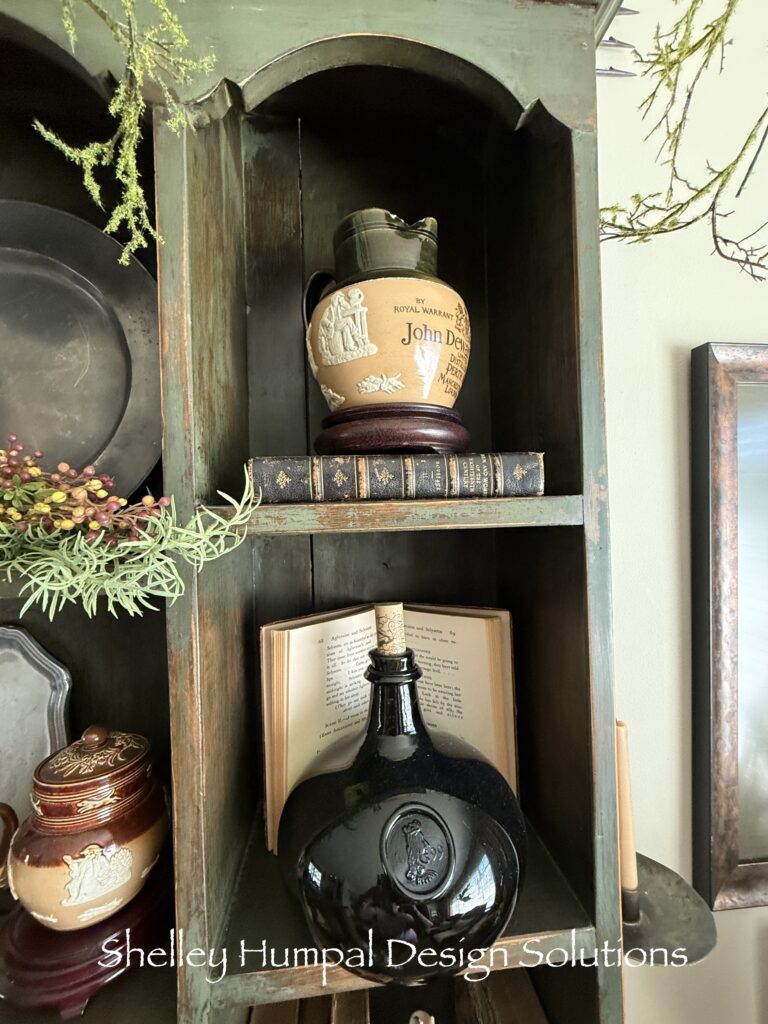
Do what’s easy first! After you have your back drop (which may need to be adjusted) I placed my Whiskey Jug in one cubby. Liked that but I only have one. Next I lined up the bottles with my seals both left and right in the cubbies. Like always when I do this, with no backdrop I lose the bottles. They are the same color as the cupboard! I have to have contrast. I struggled with this, not having any pewter that would fit that location. Usually a plate behind them will do the trick. Then I remembered I once had opened a book in one of the cubbies for a back drop for something. Could I make it work for the bottles? Turned out to be my favorite thing.
With the 3rd charger in place I brought back my two figurines with the lambs. The top shelf was as done as I could make it. Still looking for an opposing something for the top cubby on the right, it was trial and error. I brought in my Doulton Pitcher from the bedroom and It stayed there for a while.
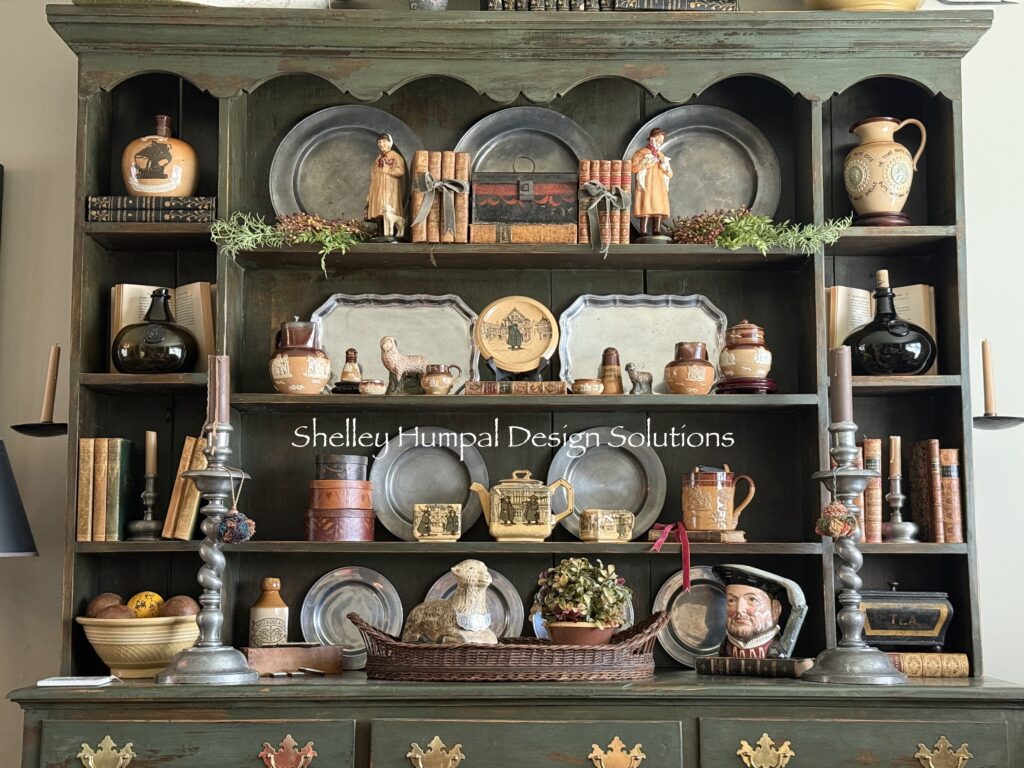
Moving to the third shelf, that was easy. I knew the Doulton Series Ware Chocolate Set, would be front and center with the two pewter plates. And, the appropriate height in which to see the quaint pattern. Adding a stack of small oval band boxes on the left and a pub ware mug on a book on the right. We’ll let that simmer.
The surface shelf was relatively simple as I like the wicker tray there with Brandy the Lamb so that just needed some support. A yellow ware bowl with croquet balls filled the bottom left cubby, and my tole tea caddy got moved down to the opposing cubby. Needs a book, I can do that!

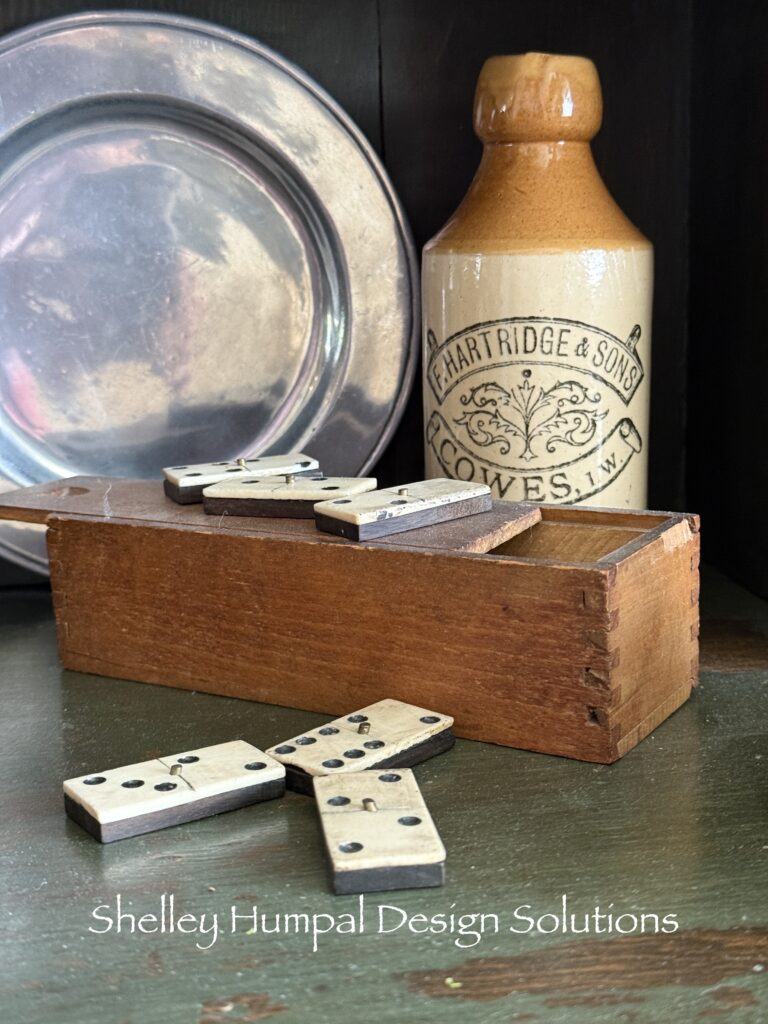
Now came the hard part. The really, small smalls. With the rectangular trays as my back drop I brought over a syrup pitcher with a pewter lid. This was my first piece I bought. Placing it on the left I balanced the other side of the shelf with a creamer and sugar bowl, my most recent find. Now what about these smalls. Two different pepper shakers, one quite tiny, and 2 small salt cellars and a darling small handled something. Not sure what that was for. Not shaped like a cup. Every time I placed these, it was just too tiny for impact, and off balance. I needed something more.
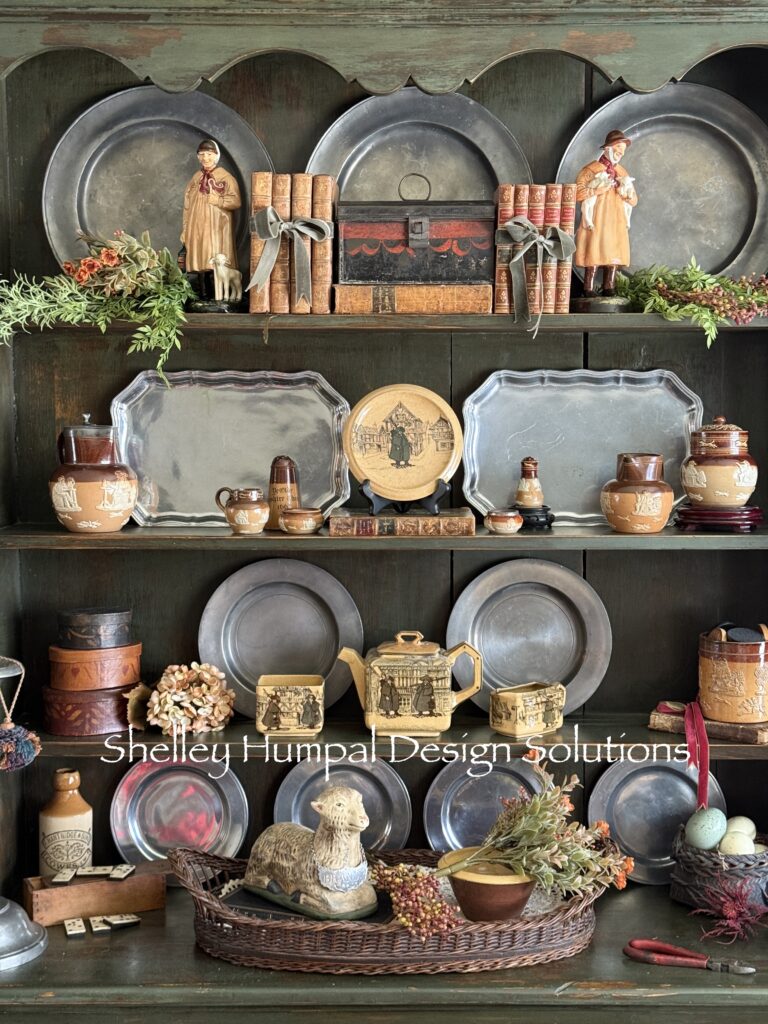

What could work? Looking around a spied another chalk ware lamb on the table. Could that work at balancing this odd group? Yup that helped!
I just kept shifting and adjusting sometimes moving the lamb a 1/4″, or flipping the shakers from one side to the other. I kept moving the larger pieces on that shelf in tighter, creating a unit. In a lot of instances things only need to be moved a fraction of an inch, to make a more important visual impact. Or does the item need to be turned just a smidge. All of these tiny little gyrations can make a world of difference. The syrup jar needs to overlap the edge of the pewter tray so that it becomes a unit. Not separate from.
I can’t tell you how many times I’ve walked away from this. I have found when I let things simmer, I can usually make them come together. Realizing I didn’t have the top shelf properly filled out or balanced, I went in to my trunks where I keep my greens. I used 3 different types of stuff. Asparagus fern, a delicate leafy thing and berries just that right fall color. I spent the entire day tweaking. More trial and error.
On the top I added my large mocha ware bowl. I tried a fall wreath over the swans neck, thinking surely that would make magic. Nope, not to be. Then I remembered my delicate moss covered twigs and threw it up there. Yes, now we’re getting somewhere. Creating a little bit of movement, and keeps it from feeling static.
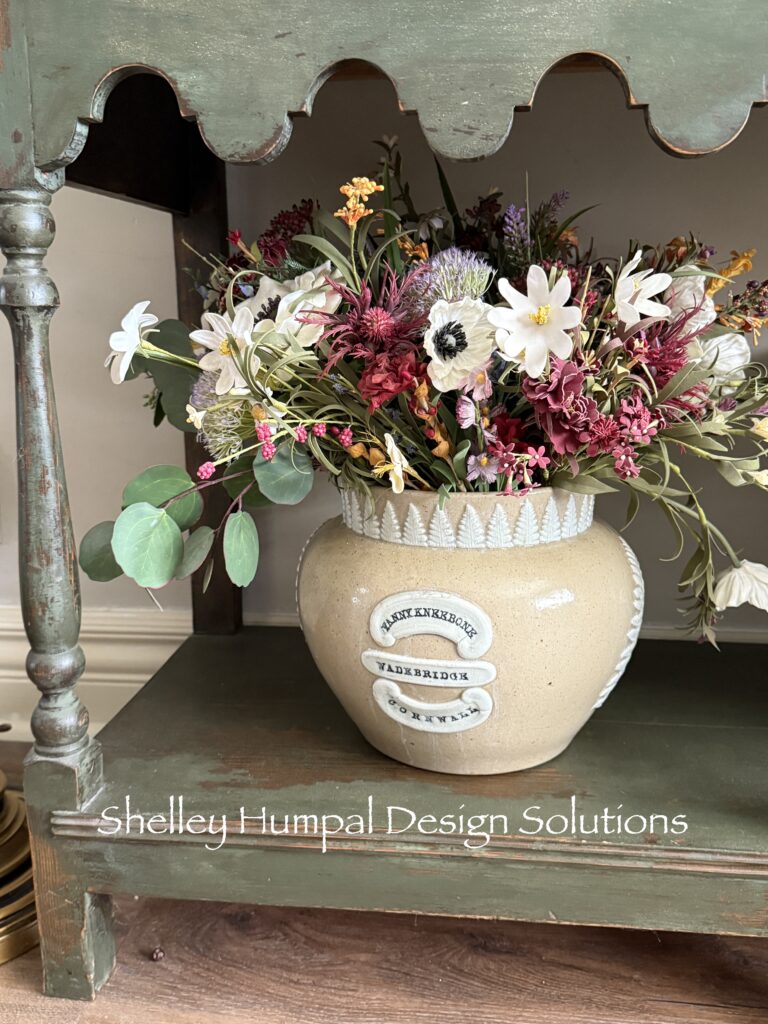
On the bottom I needed to redo the floral arrangement in my stoneware pot. Removing the summery flowers I just added in some burgundy. I think I can now say the cupboard is done. For now. Is it my all time favorite? We’ll see how it grows on me. The most important thing, I am interpreting my things in a new way, and that is always a good thing.


I hope this step by step helps you design a cupboard or bookshelf of your own. Bring together like items, similar colors, vary your textures, vary your sizes and shapes, and just play around. Nothing is written in stone. Have fun. Design is supposed to be fluid and fun. Have some!!
Next time I will give you a bit more of the “Fall” look with just small simple changes. Oh and the reveal of my “souvenir” from my trip to Minnesota.
Thanks for stopping
Shelley
Ha! I totally know how this goes. I recently put out fall for the first time in this new to us house and the tweaking, walking away, trying something different goes on for days. It is really fun though to use your things in a different manner. Hard work…but deeply satisfying. Nice to know I’m not the only one who obsesses with vignettes. Your collectibles greatly exceed mine in quality and perhaps abundance but I still enjoy the things we’ve accumulated. I’d say you’re a collector and we’re accumulators. Love this styled Cupboard, I think it was a picture of this piece that first drew me to your blog.